Stephanie Bower


Stephanie Bower | Architectural Illustration: www.stephaniebower.com | Sketching Workshops: www.stephaniebower.com | Sketches: on Instagram at @stephanieabower & http://www.flickr.com/photos/83075812@N07/ | Urban Sketchers Blog Correspondent www.urbansketchers.org | Signature member of the Northwest Watercolor Society
Showing posts with label Soaring Spaces. Show all posts

Monday, May 16, 2016

Another Step-by-Step, King Street Station

This past weekend, 15 folks from Canada, Oregon, Eastern Washington, St. Louis, and the Seattle area all joined me at Pike Place Market for an Urban Sketchers workshop I call Good Bones. It was a great group that worked hard! 

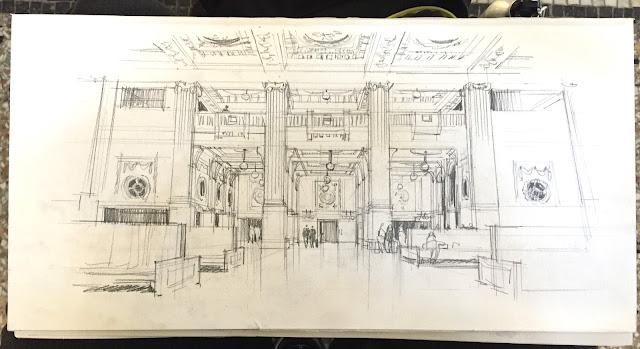
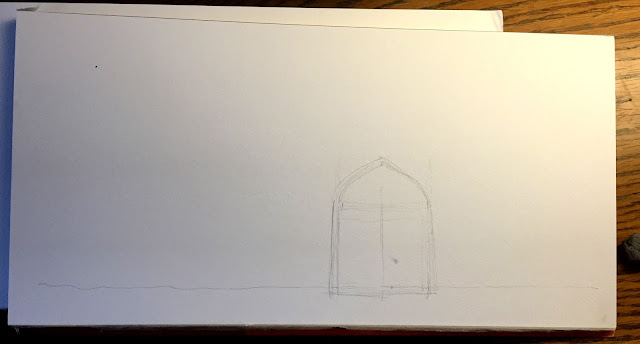
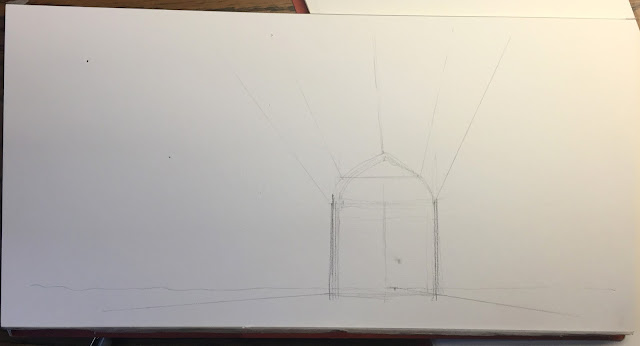
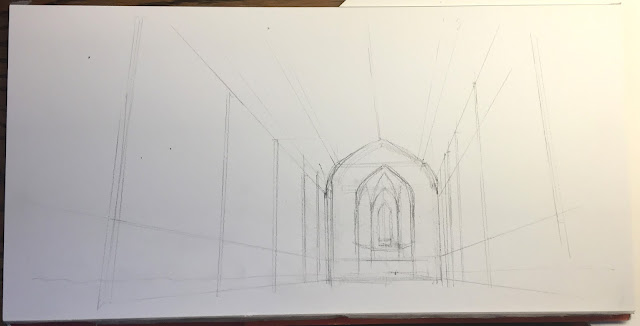
Most of the participants were able to join the Seattle Urban Sketchers monthly outing on Sunday, May 15...this is the sequence I sketched on Sunday at King Street Station, Seattle--another post to show the process of creating these views!



Monday, March 14, 2016

In the Quiet of Suzzallo, step-by-step

Yesterday, Seattle Urban Sketchers braved really wretched weather and one hour less sleep to meet at the University of Washington's Suzzallo Library--open only because this is finals week at UW.

I chose to head straight up to the 3rd floor reading room, as this space is probably the closest thing in Seattle to jolly old England...and I'm thinking ahead to the workshop I'll be teaching this summer at the Manchester symposium, called "Soaring Spaces"...encouraging everyone to LOOK UP!!

Here is a step-by-step of my process for constructing and completing this sketch--it's the same basic process that I show in my Seattle workshops, Craftsy class online, and that I show in the upcoming book, Understanding Perspective. The "shape of the space" is pretty simple, but wow, I had forgotten how complicated arches and vaults can be. 

But as I always say, perspective is easy when you know what to look for...and this is what you look for!!!


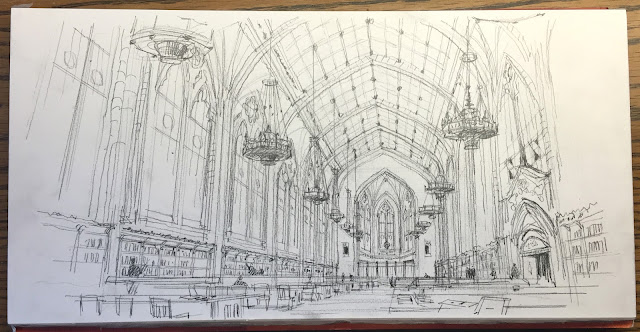
Step ONE, I hold up my pencil and usually measure the vertical line on the left, then use my pencil to also measure the width...all to get the correct proportions of the "Shape of the Space".  I transfer the shape to my paper, slightly off center to the right, small enough that I'll have room to show the space in the sketch.  I also place this shape very low on my paper, as I want to be able to draw a lot of the ceiling...this is "Soaring Spaces" after all!!!!. 
Then I locate my eye level and mark it in my sketch by drawing a horizontal line all the way across my paper...notice how LOW my eye level is relative to the shape of the space drawn.  And on the eye level line is the vanishing point, that tiny dot just to the right of center. That spot is directly in front of me as I face the back wall of the space, and it's the point where the many receding lines will all converge...


Step TWO--by drawing in the three elements of step one, I have everything I need to do this drawing accurately in perspective.  I can use the vanishing point to start drawing in the big lines, the major architectural elements of the space.  For this, I use a small plastic triangle, as it speeds things up to be able to snap accurate lines QUICKLY...


Step THREE-- you can see I'm putting more of the bones in...the verticals represent the columns, or each structural bay of the space.  I start to angle the lines closest to me to exaggerate the sense of height.


Step FOUR-- I start working on putting in the ceiling...big shapes get broken down into smaller shapes, then I break those shapes into even smaller shapes...that is how structure works!  I also start to put in the chandeliers, as they cover up a good bit of the ceiling. Each one relates to a structural bay in the ceiling, and the lamps on the left relate to the lamps on the right.


Step FIVE-- her is pretty much the complete line drawing.  I try to build up the focus with detail and linework at the back, allowing the lines closest to me to fade out.  I also added the book shelves, as that builds up the sense of activity at the pedestrian level and helps to ground the sketch.  Notice how FLAT the tables are because they are so close to my eye level. Notice how details are just suggested, I don't take the time to actually draw in every detail.


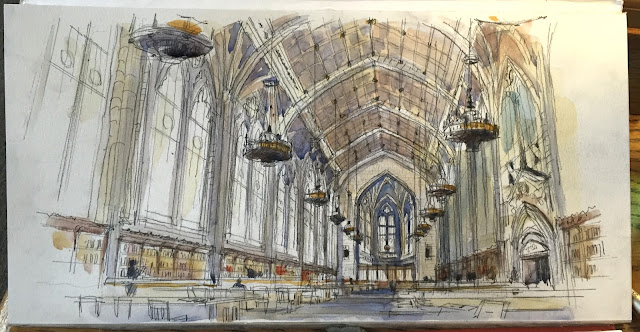
Step SIX--Color...I started by putting an underpainting layer of yellow on all the areas I want to be warm, usually the surfaces that advance spatially or are in the sunlight (what little there was!)  Then I layer in more colors...mostly grays, as nearly everything in this space was gray to beige...I also build up the color carefully at the end of the space, the focal point of the perspective and the sketch.


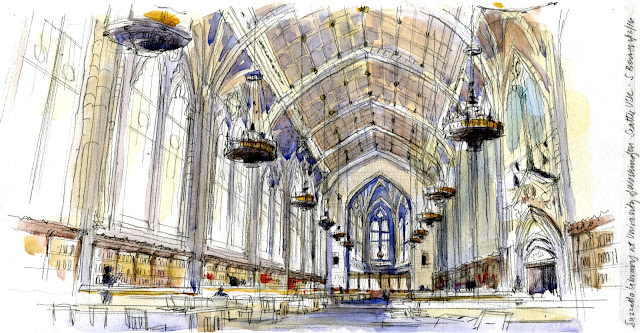
And here is a scan of the final image, complete with signature and reminder of where I was! Also a detail so you can actually see the linework.  I often lose a lot of the linework once I add color, which always makes me a little sad, as I LOVE the pencil work. 


And there it is, beginning to end.  Good practice for England this summer!! It took about 1 hour and 15 minutes, sketched and painted on location.  Paper is a Fluid watercolor block 8" x 16", Winsor & Newton watercolors, and my favorite Escoda Reserva size 10 travel brush.  Also my 1" angled synthetic brush.

If you found this explanation helpful, please leave a comment below... it would be great to get a sense for how many people actually look at this blog!  I will continue posting more sketches that show the process I use.  Thanks very much!